A new Windows 11 update “Feature” has begun throttling all browsers including Google Chrome called “Windows Efficiency Mode”. To Disable it ALL Shortcuts for Chrome will need to be updated. If not updated, every shortcut will open in Efficiency Mode. This includes shortcuts Quick Launch, Desktop Shortcuts, and Start Menu.
If you are experiencing Tab/Browser Crashes, or Frozen / Unresponsive Pages in TLDCRM, it’s likely Windows Efficiency Mode trying to Save the planet by reducing your power usage While Crippling your Computer in the interim.
How can I tell Windows Efficiency Mode is Running?
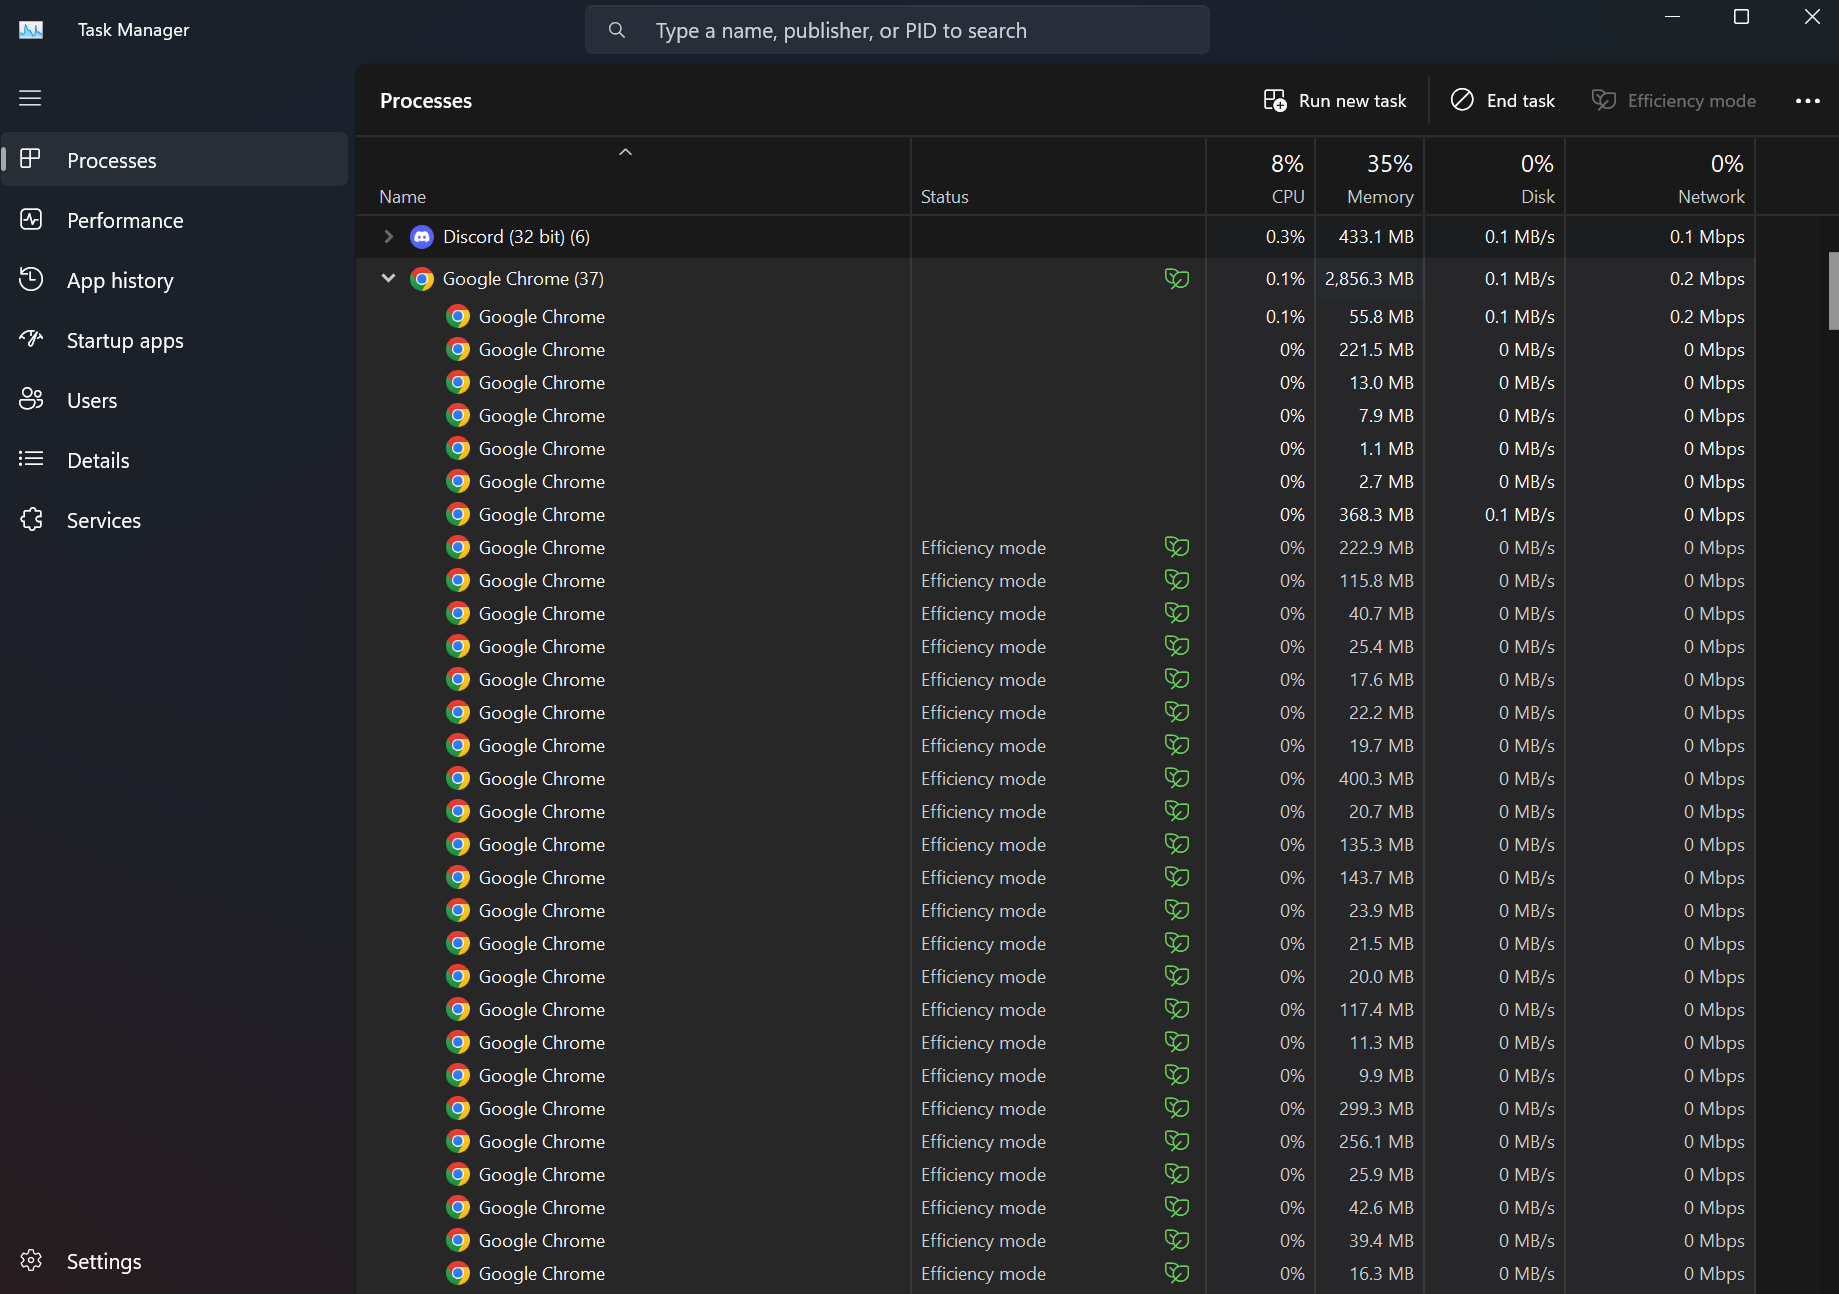
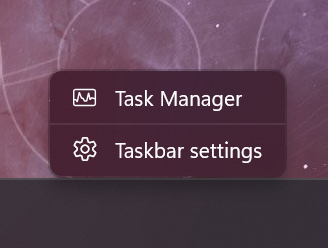
1. Right-click the Start menu and select Task Manager.


2. In Task Manager, locate the Google Chrome process, selecting the arrow next to it to view the various chrome.exe processes in the list.
3. You should see Efficiency Mode listed in the Status tab for any processes that have the feature enabled. If any of the chrome.exe processes have this label in this column, it means that efficiency mode is enabled for this process and is active overall for Google Chrome.
4. You will also see a green leaf icon next to processes that have the feature enabled.
How to Permanently Disable Efficiency Mode for Chrome
Unfortunately Microsoft has given NO OPTION TO DISABLE EFFICIENCY MODE GLOBALLY on your entire PC. You can only disable this mode on apps that support disabling it, and it is not simple.
To disable Windows Efficiency mode in Google Chrome, follow these steps.

- Make sure that Chrome isn’t running. If it is, make sure to exit it, ensuring that no chrome.exe processes are running in Task Manager.
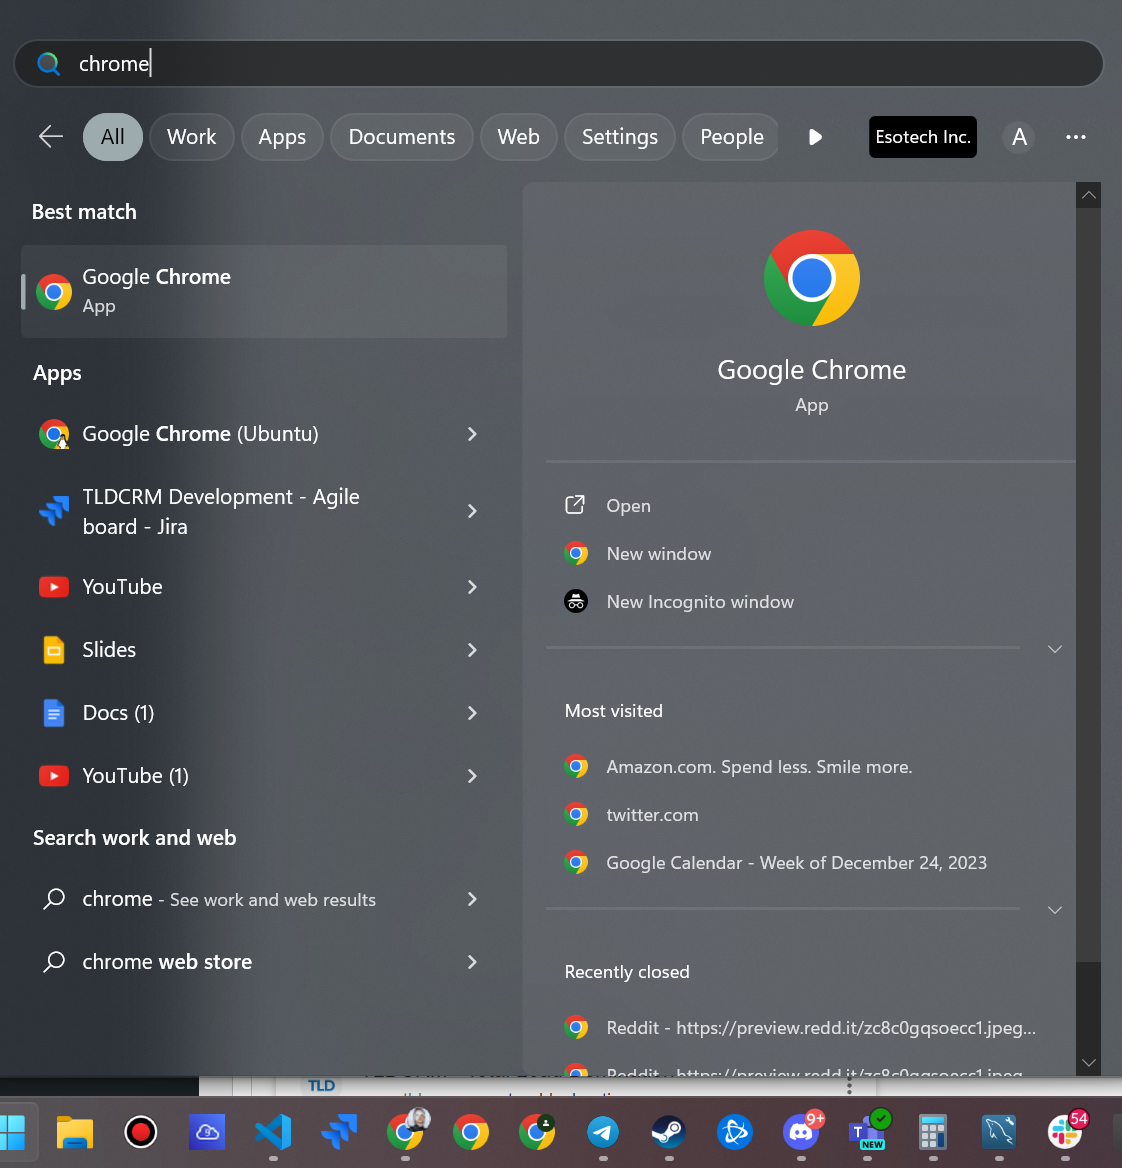
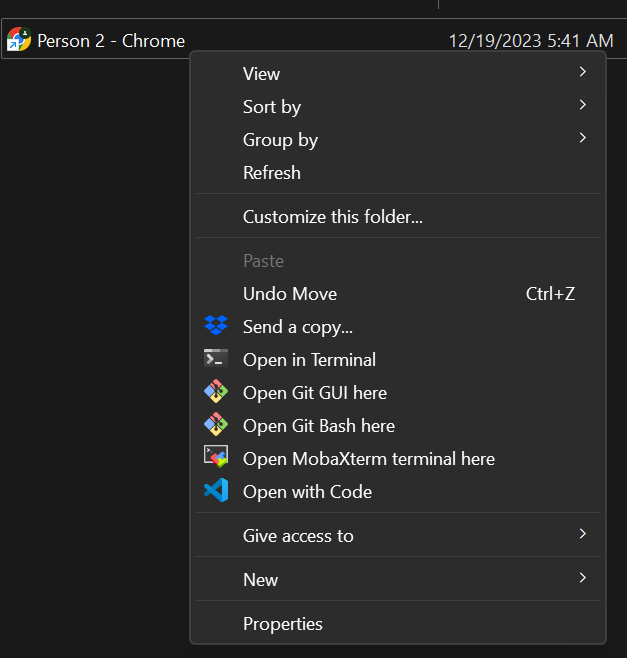
- Next, open the Start menu, locate Google Chrome, right-click the app, and press Open File Location.
- Next, right-click the Google Chrome shortcut in the File Explorer window that opens and select Properties.
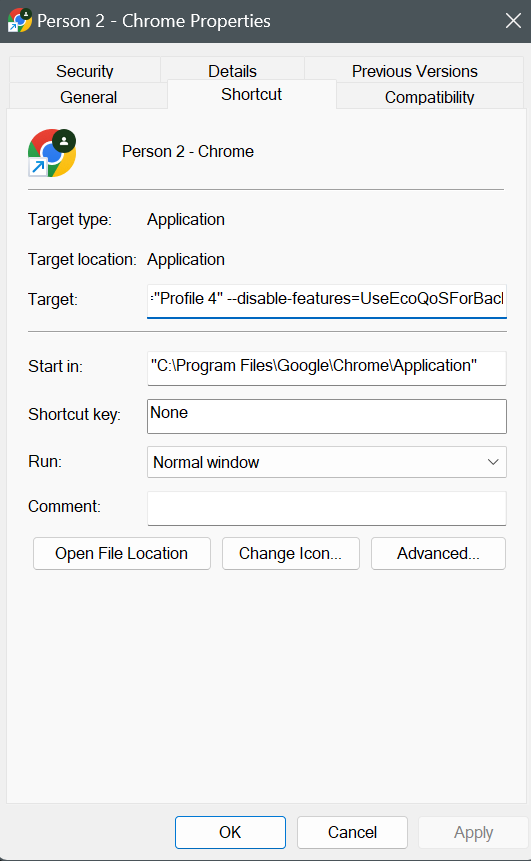
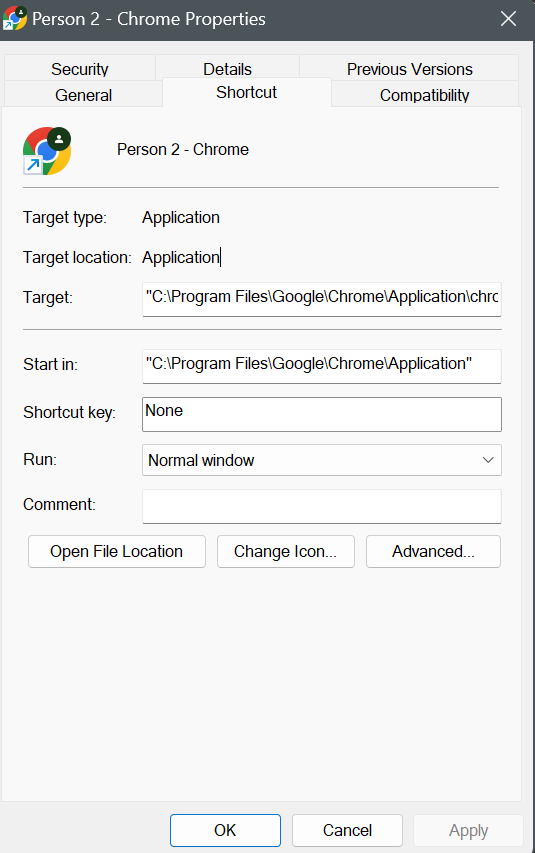
- In the Properties window, press the Shortcut tab at the top.
- In the Target field, add a space after the existing chrome.exe location.
- At the end of the existing text, make sure you add a space and after that enter this:
--disable-features=UseEcoQoSForBackgroundProcess, making sure there is no quotation mark after the command.- It should look like this in the end
"C:\Program Files\Google\Chrome\Application\chrome.exe" --disable-features=UseEcoQoSForBackgroundProcess
- It should look like this in the end
- Click OK to save the changes and close the Properties window.
You’re not Done Yet!
Do you sometimes Open Chrome from the Taskbar, or press the windows Key and Load it From the Start Menu? You need to repeat the same process above, but you ALSO have to go find the Shortcuts to update.
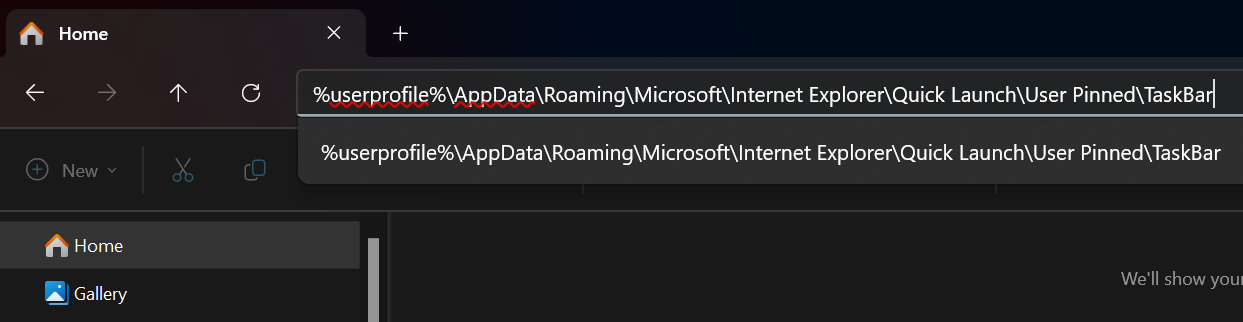
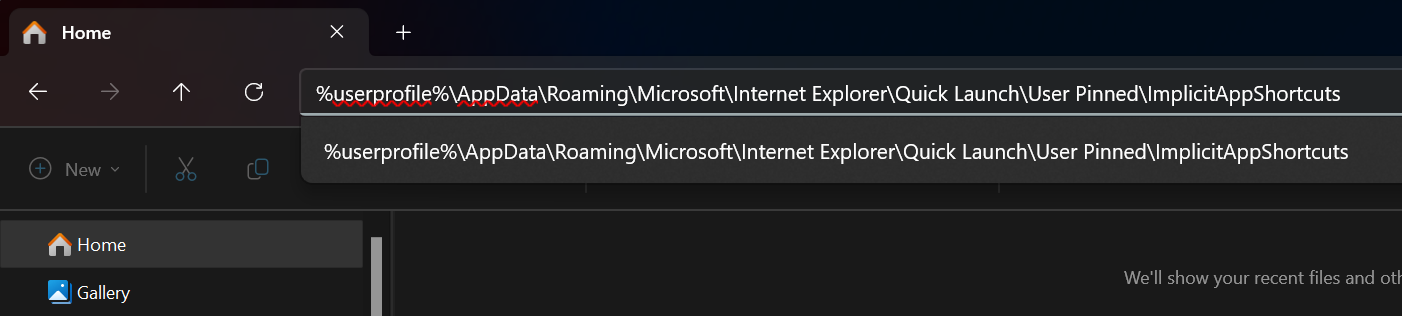
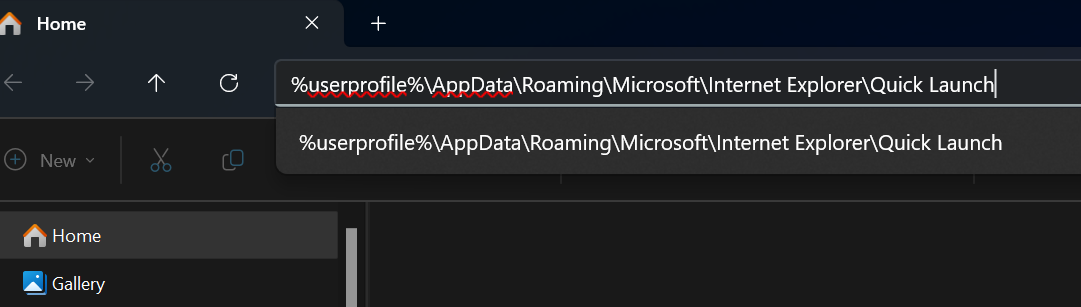
You can find these locations by opening your File Explorer in Windows and in the URL Bar in File Explorer paste the following Locations and find anything related to Google Chrome and Update the Shortcuts the same way you did above by adding the --disable-features=UseEcoQoSForBackgroundProcess flag to every shortcut
Quick Launch Shortcuts
%userprofile%\AppData\Roaming\Microsoft\Internet Explorer\Quick Launch
--disable-features=UseEcoQoSForBackgroundProcess

Task Bar Shortcuts
%userprofile%\AppData\Roaming\Microsoft\Internet Explorer\Quick Launch\User Pinned\TaskBar
--disable-features=UseEcoQoSForBackgroundProcess
“Chrome Shortcut Apps”
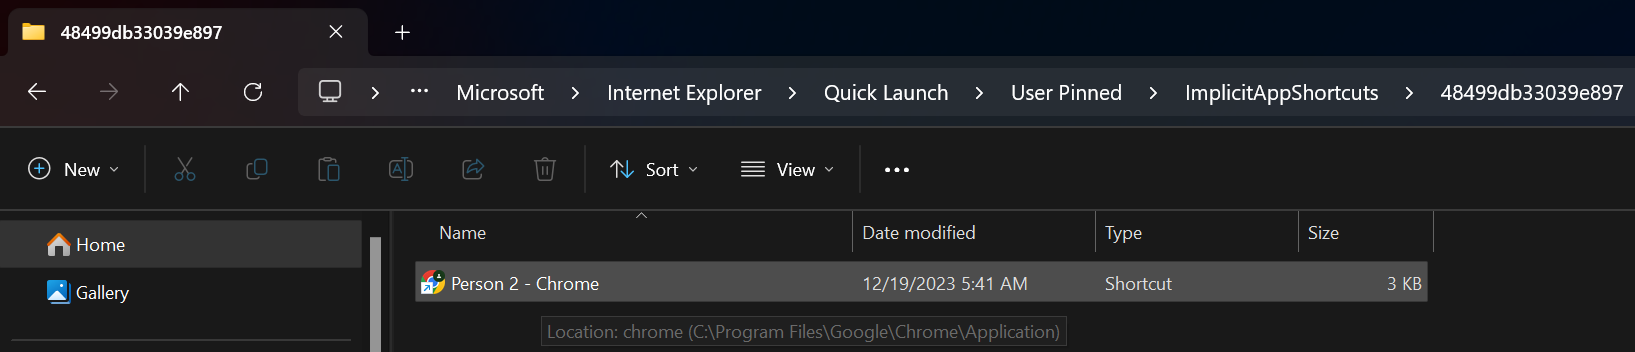
%userprofile%\AppData\Roaming\Microsoft\Internet Explorer\Quick Launch\User Pinned\ImplicitAppShortcuts
--disable-features=UseEcoQoSForBackgroundProcess
These will be in weirdly named Folders, you need to check Each Folder.
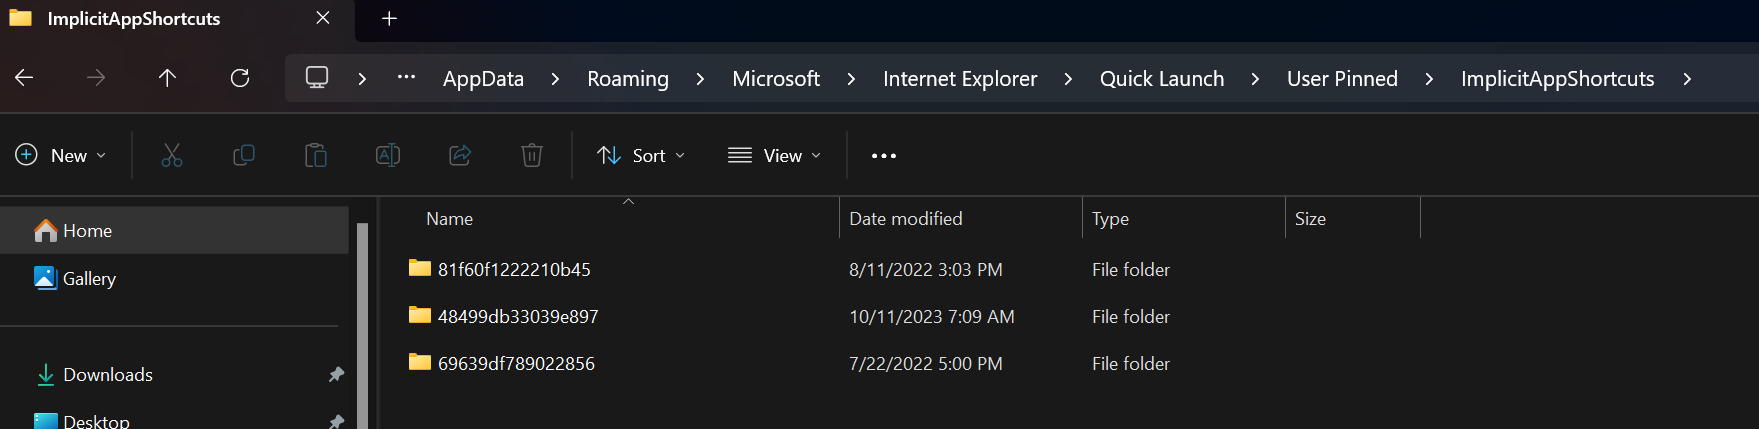
Each Folder might Havbe a Chrome Link, or another app. You only need to worry about the Chrome Links.
Desktop
Find Any Chrome Icon on your Desktop and update all of them. Updating one does NOT update All of them! If you have Multiple Chrome Profile Shortcuts ALL must be updated!

Start Menu
Anything in Start Menu by pressing the Start button and searching for Chrome. You can right click the icon that shows up here.
Verify!
Finally, Open your Task Manager and make sure there aren’t any Green Leaves on any of the Chrome Processes or Sub-processes. If there are no Leaves, then you are good to go!
Wait! There is more! Bonus! Turn Off Chrome Memory Saver!
Chrome itself ALSO has a Memory Saver Mode which can cause problems with pages and tabs. For an extra step let’s go through disabling this as well.
In Chrome go to More Tools -> Performance

You will see 2 settings. Memory Saver and Preload Links, they will be on by Default.
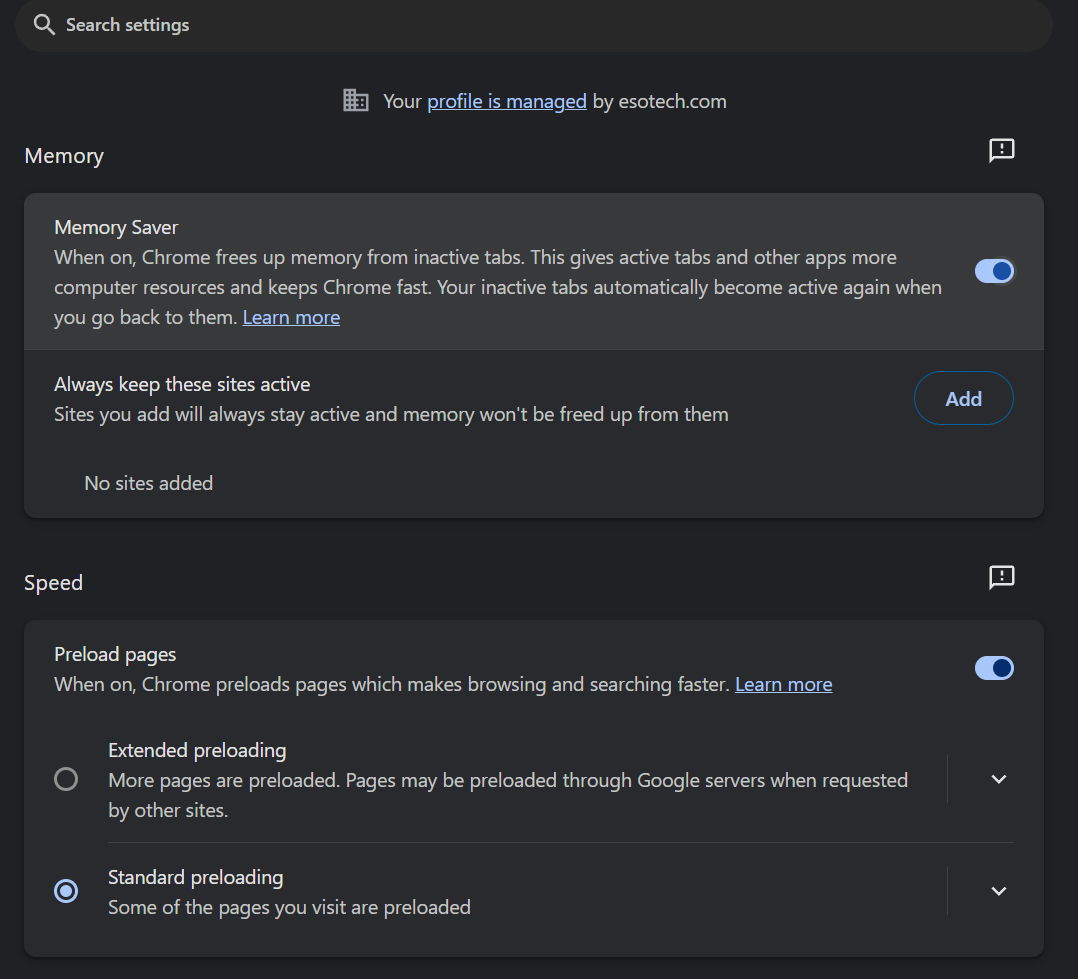
Turn Memory Saver Off
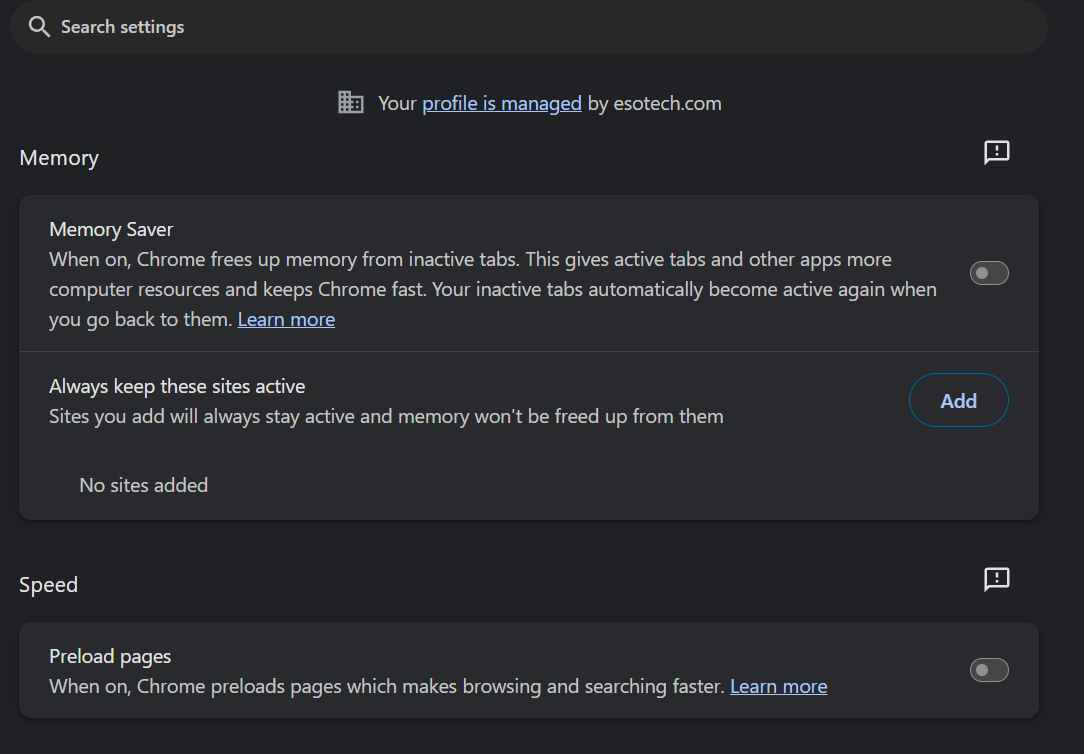
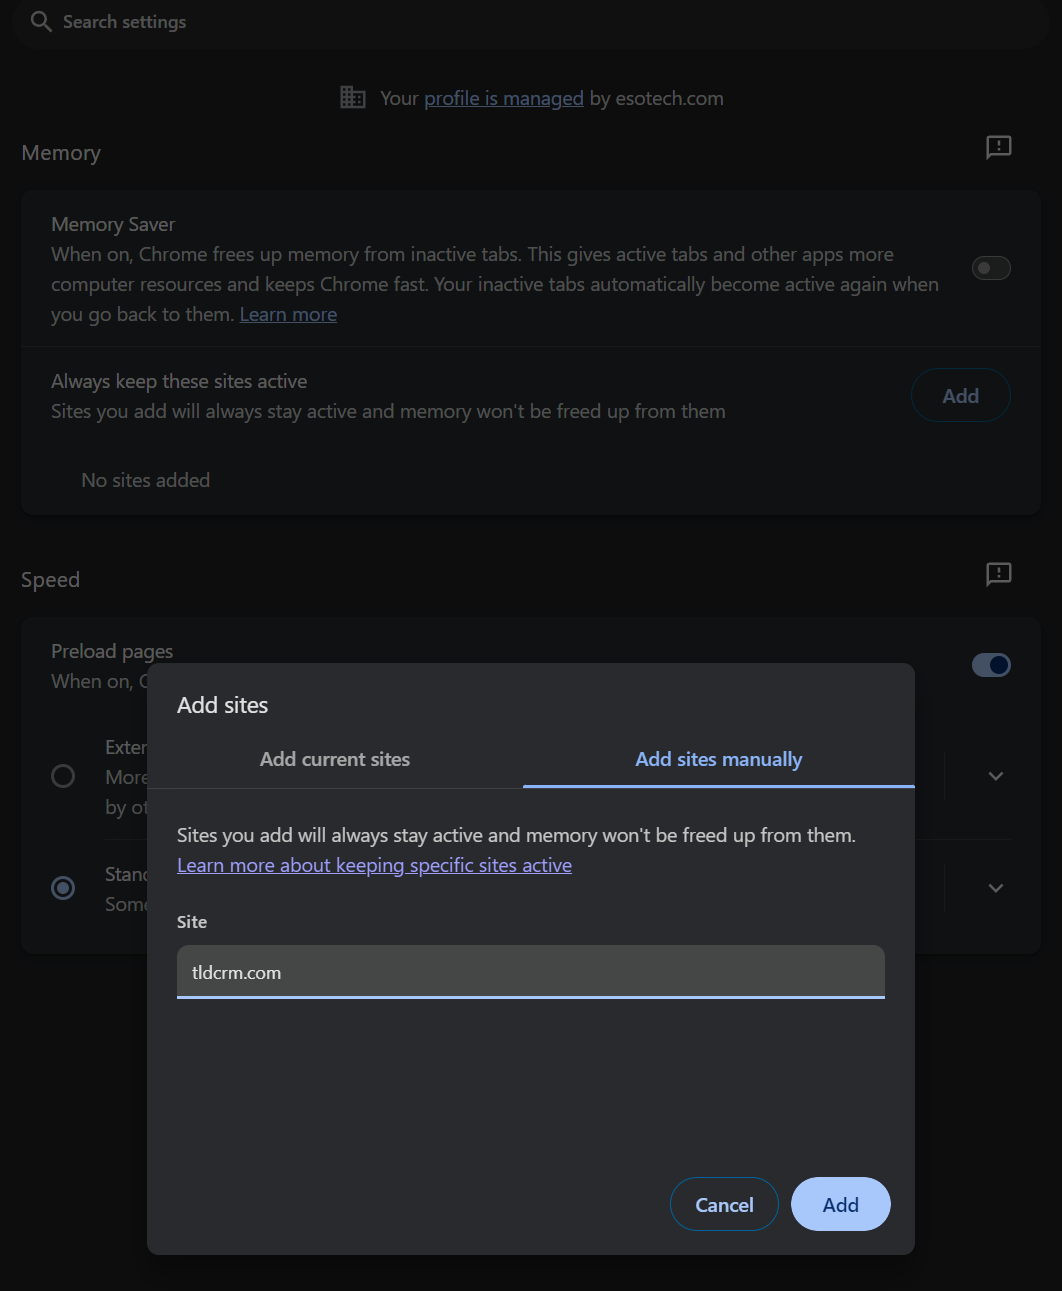
Optional: Allow tldcrm.com to bypass Memory Saver
If you want to keep Memory Saver on but want better performance on TLDCRM, you can just Manually Add tldcrm.com into the memory saver active list.
Double Bonus! Uninstall McAffee Anti-Virus and MCaffee Web Advisor
Disable Windows Efficiency Mode for Google Chrome on Windows 11
Disable Efficiency Mode for Windows 11
A new Windows 11 update “Feature” has begun throttling all browsers including Google Chrome called “Windows Efficiency Mode”. To Disable it ALL Shortcuts for Chrome will need to be updated. If not updated, every shortcut will open in Efficiency Mode. This includes shortcuts Quick Launch, Desktop Shortcuts, and Start Menu.
If you are experiencing Tab/Browser Crashes, or Frozen / Unresponsive Pages in TLDCRM, it’s likely Windows Efficiency Mode trying to Save the planet by reducing your power usage While Crippling your Computer in the interim.
How can I tell Windows Efficiency Mode is Running?
- Right-click the Start menu and select Task Manager.
- In Task Manager, locate the Google Chrome process, selecting the arrow next to it to view the various chrome.exe processes in the list.
- You should see Efficiency Mode listed in the Status tab for any processes that have the feature enabled. If any of the chrome.exe processes have this label in this column, it means that efficiency mode is enabled for this process and is active overall for Google Chrome.
- You will also see a green leaf icon next to processes that have the feature enabled.
How to Permanently Disable Efficiency Mode for Chrome
Unfortunately Microsoft has given NO OPTION TO DISABLE EFFICIENCY MODE GLOBALLY on your entire PC. You can only disable this mode on apps that support disabling it, and it is not simple.
To disable Windows Efficiency mode in Google Chrome, follow these steps.
- Make sure that Chrome isn’t running. If it is, make sure to exit it, ensuring that no chrome.exe processes are running in Task Manager.
- Next, open the Start menu, locate Google Chrome, right-click the app, and press Open File Location.
- Next, right-click the Google Chrome shortcut in the File Explorer window that opens and select Properties.
- In the Properties window, press the Shortcut tab at the top.
- In the Target field, add a space after the existing chrome.exe location.
- At the end of the existing text, make sure you add a space and after that enter this:
--disable-features=UseEcoQoSForBackgroundProcess, making sure there is no quotation mark after the command.- It should look like this in the end
"C:\Program Files\Google\Chrome\Application\chrome.exe" --disable-features=UseEcoQoSForBackgroundProcess
- It should look like this in the end
- Click OK to save the changes and close the Properties window.
You’re not Done Yet!
Do you sometimes Open Chrome from the Taskbar, or press the windows Key and Load it From the Start Menu? You need to repeat the same process above, but you ALSO have to go find the Shortcuts to update.
You can find these locations by opening your File Explorer in Windows and in the URL Bar in File Explorer paste the following Locations and find anything related to Google Chrome and Update the Shortcuts the same way you did above by adding the --disable-features=UseEcoQoSForBackgroundProcess flag to every shortcut
Quick Launch Shortcuts
%userprofile%\AppData\Roaming\Microsoft\Internet Explorer\Quick Launch
--disable-features=UseEcoQoSForBackgroundProcess
Task Bar Shortcuts
%userprofile%\AppData\Roaming\Microsoft\Internet Explorer\Quick Launch\User Pinned\TaskBar
--disable-features=UseEcoQoSForBackgroundProcess
“Chrome Shortcut Apps”
%userprofile%\AppData\Roaming\Microsoft\Internet Explorer\Quick Launch\User Pinned\ImplicitAppShortcuts
--disable-features=UseEcoQoSForBackgroundProcess
These will be in weirdly named Folders, you need to check Each Folder.
Each Folder might Havbe a Chrome Link, or another app. You only need to worry about the Chrome Links.
Desktop
Find Any Chrome Icon on your Desktop and update all of them. Updating one does NOT update All of them! If you have Multiple Chrome Profile Shortcuts ALL must be updated!
Start Menu
Anything in Start Menu by pressing the Start button and searching for Chrome. You can right click the icon that shows up here.
Verify!
Finally, Open your Task Manager and make sure there aren’t any Green Leaves on any of the Chrome Processes or Sub-processes. If there are no Leaves, then you are good to go!
Wait! There is more! Bonus! Turn Off Chrome Memory Saver!
Chrome itself ALSO has a Memory Saver Mode which can cause problems with pages and tabs. For an extra step let’s go through disabling this as well.
In Chrome go to More Tools -> Performance
You will see 2 settings. Memory Saver and Preload Links, they will be on by Default.
Turn Memory Saver Off
Optional: Allow tldcrm.com to bypass Memory Saver
If you want to keep Memory Saver on but want better performance on TLDCRM, you can just Manually Add tldcrm.com into the memory saver active list.
Double Bonus! Uninstall McAffee Anti-Virus and MCaffee Web Advisor
We have a theory that something has changed with Chrome and Mcaffee Web Advisor / McAffee Anti-virus interactions along with Windows Efficiency Mode.
Everyone we have done troubleshooting with this Throttling issue has also had it installed and we removed it.
- Press Start.
- Search for Add / Remove Programs and Open it.
- Type “Mc” in the search.
- Uninstall McAffee Web Advisor.
- Uninstall McAffee, make sure to choose the checkboxes to remove all app settings.
Conclusion
The above steps are not just for TLDCRM, they should improve your computers performance in general for Google Chrome and Web-Based applications.
We hope this helps smooth out any performance issues you may be having.